Managing Projects
Setting Up a Project
All work in DimensionIQ must be done within a project file. A project is the top-level container that holds everything related to a job, including drawings, folders, and the measurements created during the takeoff process. Only one project establishes the active workspace for your work.
Add a New Project
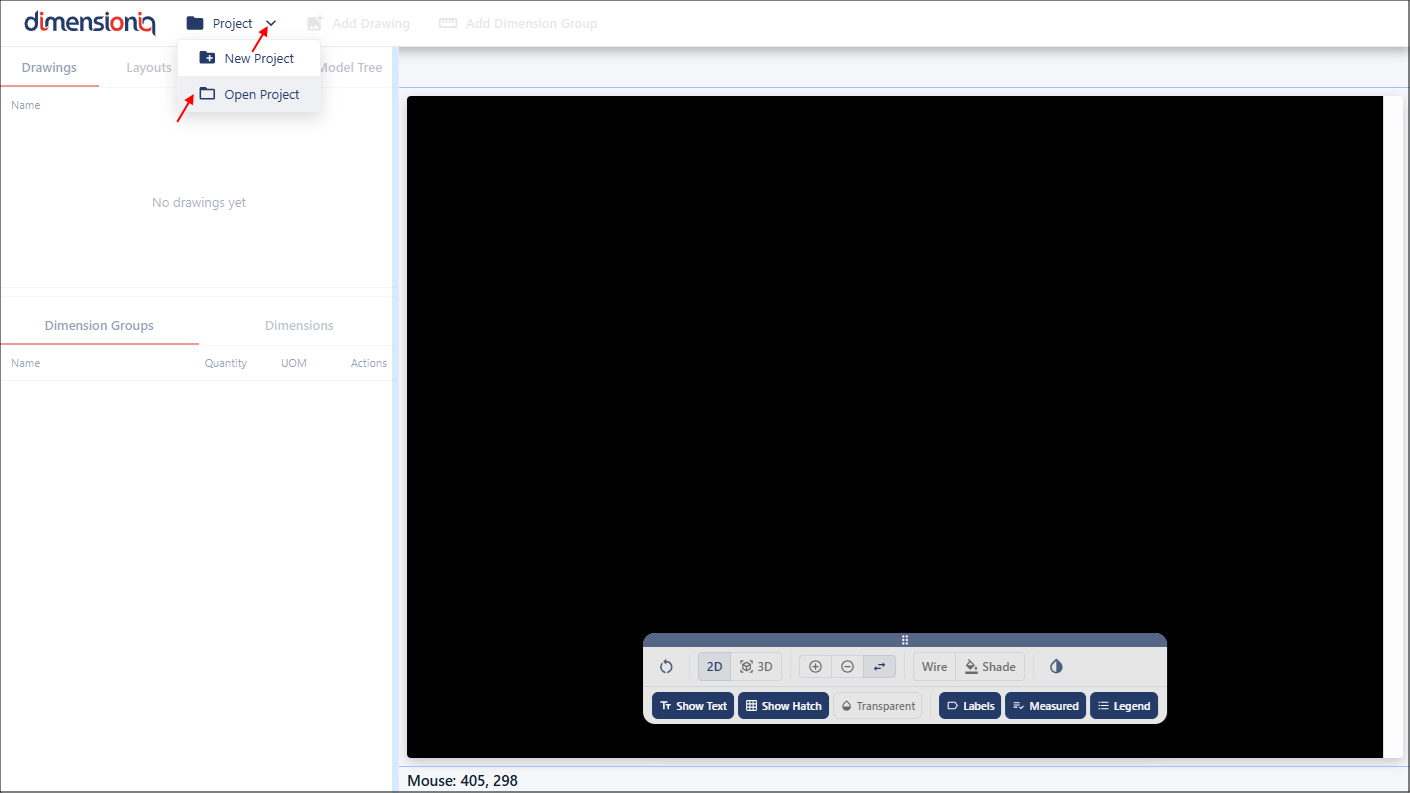
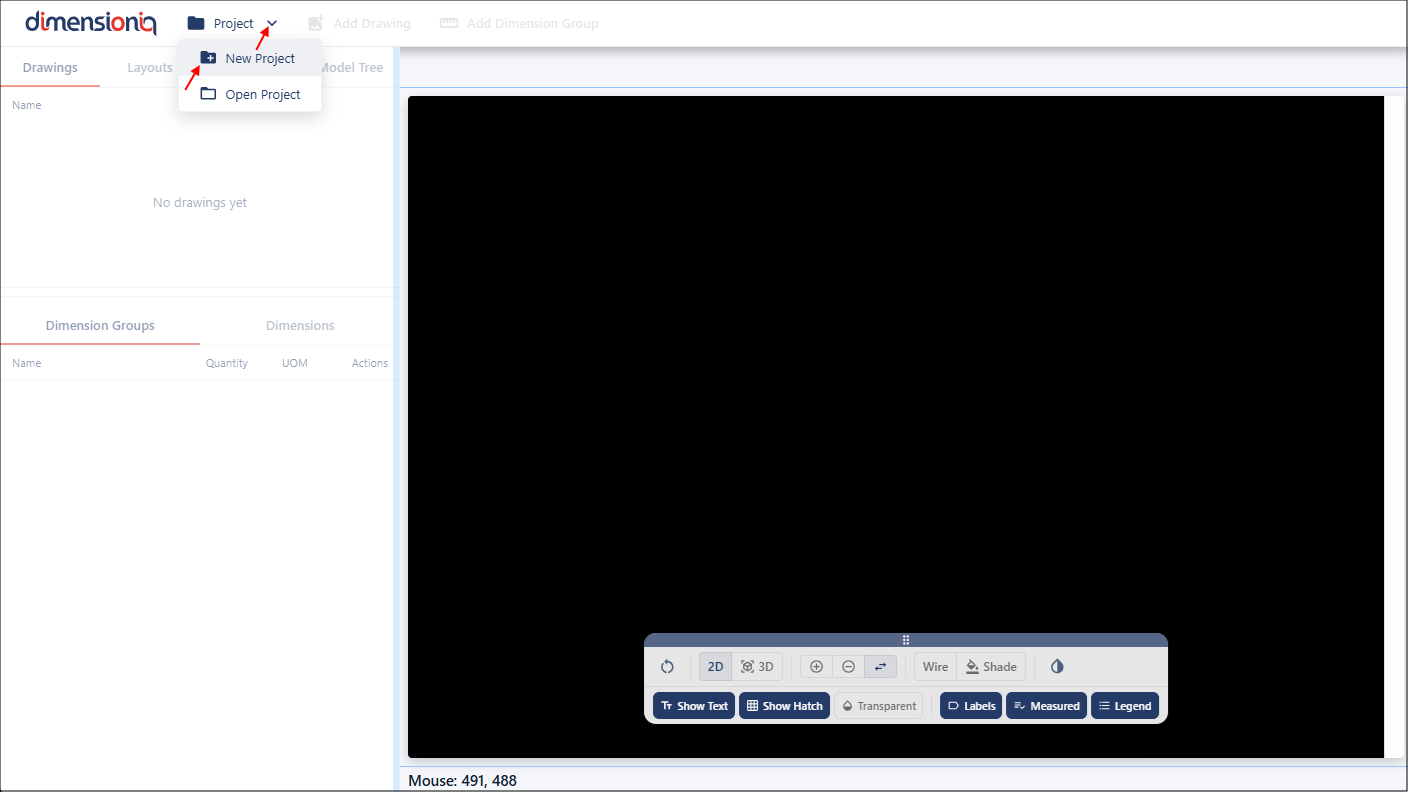
To add a new project, click the Project dropdown in the toolbar. Select New Project to open the Project Properties dialog.
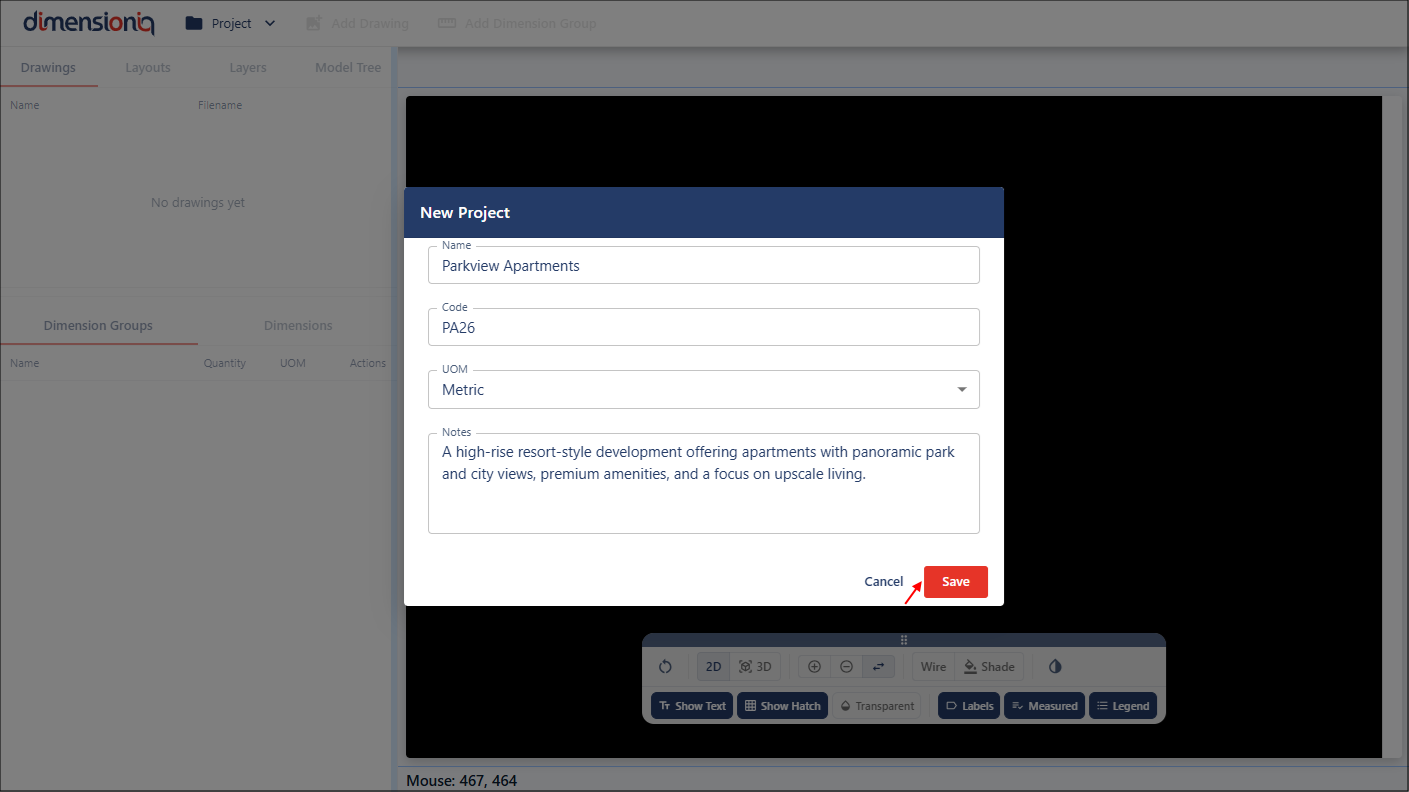
When creating a new project, enter a name for the project and optionally a code and notes to store additional information about the project.
The UOM (Unit of Measure) field is used to define the measurement units that will be used for the dimensions in the project. The default setting is Metric, but this can be changed to Imperial.
After entering the project details, click the Save button.
Once the project is saved, the project name will appear in the top toolbar on the left-hand-side.
View or Edit the Project Properties
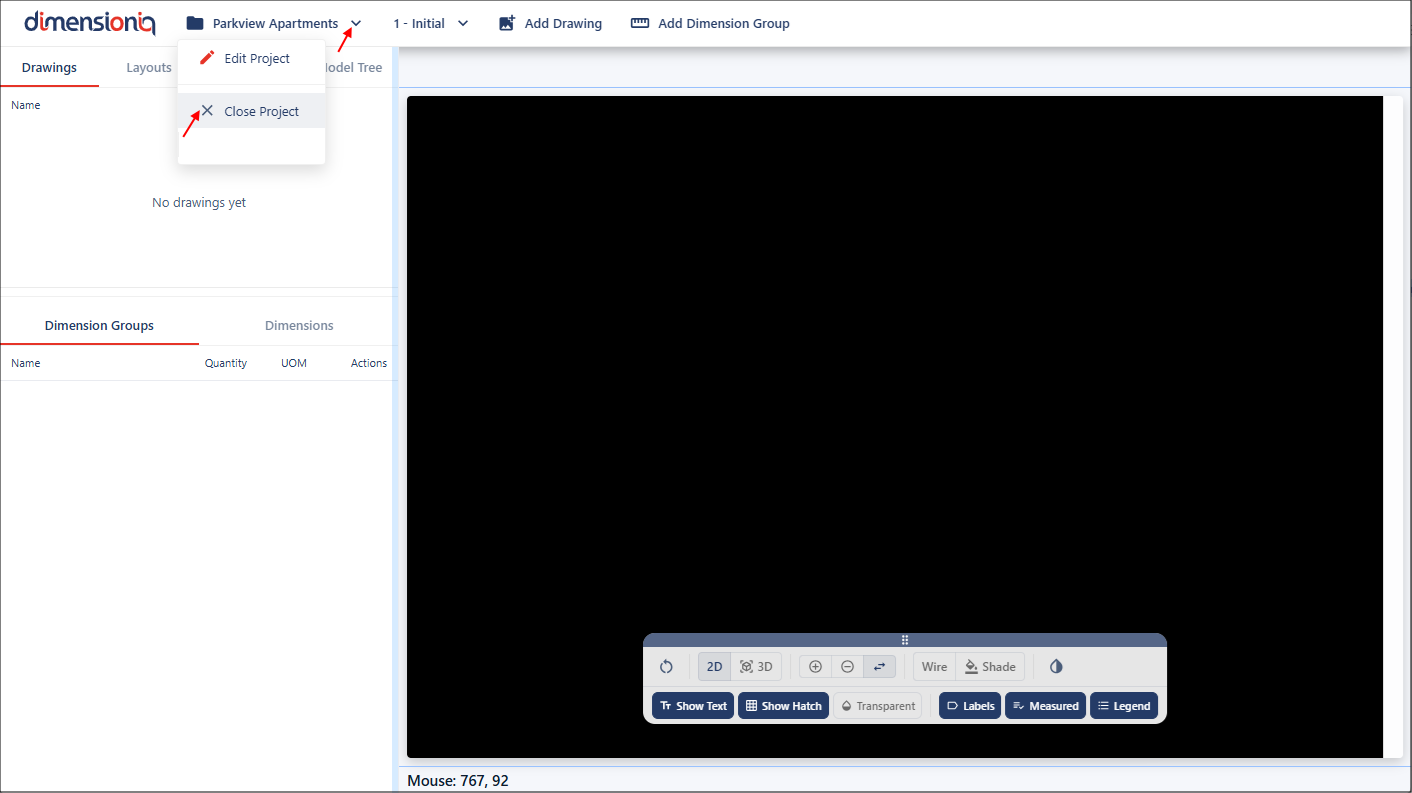
To view or edit the properties of an open project, click the dropdown next to your project name. Select Edit Project to open the Project Properties dialog.

Close a Project
To close a project, click the dropdown next to your project name. Select Close Project to remove the project from the viewport.
Open an Existing Project
To open an existing project, click the Project dropdown in the toolbar and select Open Project. Once your project is loaded, the project name will appear in the toolbar.